

We cannot insist more on how riding a bike is beneficial to your kid, which we have covered – makes us a leading kids’ bike blog. This can only mean one thing, that for kids to enjoy the fun while on bikes and for you as a parent to enjoy the longevity of your investment, bike maintenance on your kids’ bike is a mandatory affair if not a norm.
Right from when the kids or yourself unbox the bike, the responsibility of taking care of the bike automatically begins.
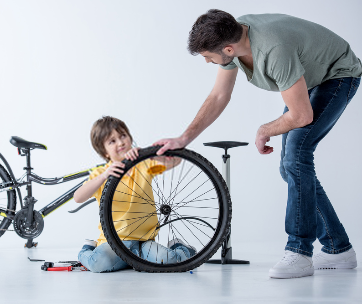
The initial maintenance when the bike is new entails setting up the bike to fit the rider. Once you get the fit right, you need to ensure that it is maintained throughout its life cycle.
Fitting the Bike right from the Box
Out of the box, you need to begin by reading the user’s manual. However, thanks to technology, you can access the manuals via your phone. And if you are the analog lot, you can pretty much flip through the physical manual that sometimes comes with the bikes.
Once you’ve read the manual, it is now time to begin by assembling the bike. Some bikes come pre-assembled, leaving you with the tires, pedals, handlebars, and seat post to fix.
After assembling the bike, you need to tune it to meet the dimensions of the rider. Finally, you will need to make a few adjustments to ensure the safety, comfort, and performance of the kid riding the bike.
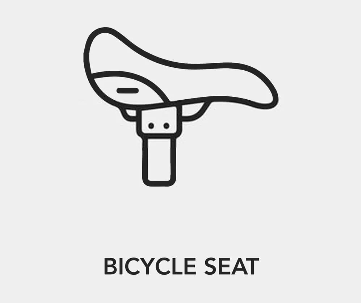
Seat height adjustment
Begin by adjusting the seat height. Most kids’ bikes come with either a screw-to-fit seat clamp or a quick-release clamp. Opening the respective seat clamps allows you to move the saddle either up or down. This is a standard procedure, whether for balance bikes or pedal bikes. If your kid is experienced, ensure that they can tiptoe when seated on the bike. On the other hand, for the timid riders or riders just starting or learning to ride, ensure that they can place their feet on the ground while sitting on the bike.
Reach adjustment
You also need to adjust the reach of the kid on the bike. Reach refers to the distance from the bottom bracket to the head tube. It simply means the distance from the saddle to the handlebars. Again, you can make the adjustments to help the rider attain a posture that befits their riding style and comfort. To do this, adjust the handlebars either forwards or backward. You can do so by using an Allen key to loosen the bolt that holds the handlebar to the stem. When seated on the saddle, it is ideal that the kid has their arms coming down at 40-60 degrees, and they are slightly leaning forward.
Brake’s adjustment
After adjusting the reach and the seat height, you further need to adjust the brakes as needed. You can tighten or loosen the brakes to a better feel depending on the reach of the child. Finally, adjust the brake handles and the brake levers altogether.
The ABCD Check (Pre- and Post-Rides)
Having completed the initial bike setup, it is also necessary to perform some checks on the bike pre- and post-rides. This is a tedious process for most parents that can only wait for weekend visits to the bike mechanics or bike shops for maintenance. Nevertheless, maintenance should be an ongoing process unless it is a major service.
For complete routine maintenance, you need to perform the Air, Brakes, Chain, and Drop check test on your kids’ bike.
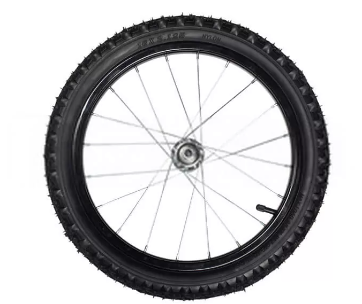
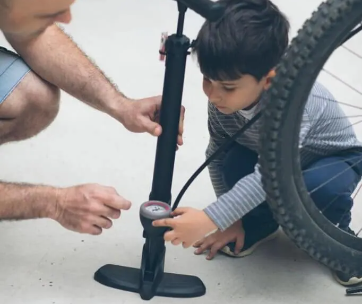
Check the Air (A)
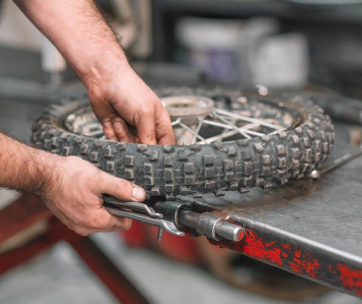
check the tire pressure, and inflate the tires to the recommended pressure. In most cases, as we already mentioned in our tire buying guide, the recommended PSI is recorded on the tire's sidewalls. You should generally maintain the recommended PSI or BAR units for the specific kids’ bike tire. From what we have gathered, 35-45 PSI or 2.4-3.1 bar works well with kids’ bikes. However, if you are doing off-road with the kid on their bike, ensure you run slightly lower pressure units to avoid too wobbly rides.
The process of inflating a kids’ tire bike is just like any other tire. First, you need to invest in a good pump. Then, connect the pump to the valves of the wheel, and you are good to go. Pump up to the required pressure, and measure using the pump’s gauge. Disconnect once you attain the suitable pressure unit.
In our experience, when tires are left unused or even when in use, air leaks occur through the rubber. Checking the tire pressure ensures that you top up or reduce the pressure depending on the type of surfaces that your kid rides their bike.
Check the Brakes (B)
A kid on a bike rolls their most beloved possession, and sometimes they go so fast that they need enough stopping power. Therefore, it is mandatory to check whether the brakes are working correctly. If the bike has a coaster brake instead of handbrakes, ensure that they know how to activate it. Also, ensure that it works well. Furthermore, ensure that the kid can comfortably reach the brake levers and that the brake pads are in good shape, fit well, and are operational.
If you need to adjust the brakes, ensure that you adjust the front and back brakes evenly. Do not let the brakes have uneven stopping power. Also, teach your child which brake lever activates the front and which one activates the rear brake.
Finally, if there are any issues with the brakes, ensure that a bike mechanic has it checked and corrected.
Check the Chain (C)
Putting the right amount of lubrication to the chain inflates the bike tires to correct pressure. When lubricating the chain, which is part of a regular routine, ensure that you use the right lubricant. The choice of a chain lubricant will again depend on where your kid mostly rides. There are wet and dry lubes that are used to oil the chain. Some people prefer using grease, but this is an old practice. There are specific chain lubes with advancements in technology and research (such as the Park Tool PolyLube) that you can buy and use.
Ensure that you lubricate when the chain is dry. This means that you need to wash the chain. Again, there are bike chain cleaning tools that make cleaning a kids’ bike chain a tad easy.
But before washing, you can use a bike-specific degreaser (such as the WD-40) to remove the old oil or lube from the chain. Ensure that you use hot or warm water mixed with soap or bike cleaner to clean the dirty degreaser. As soon as the cleanliness catches your eyes, rinse with the warm water.
After washing the chain, wipe it dry or wait for it to dry, then apply the high-quality chain lube and wipe it down with a clean rag.
Now Do the Drop Test (D)
Once the bike is dry, every moving part is sprayed with a light spray oil such as GT85; you can now wind up the whole check-up process by doing the drop test.
The drop test entails raising the bike with handlebars and the seat to about 6-inches from the ground then dropping it. As you drop it, pay attention to any squeaky or rattling noises from loose parts. If there are sounds, find the culprits and adjust appropriately.
With this test passed, a bike is ready to be ridden. This check should be a routine if you want to have the kids’ bike around for the longest time. After all, who would waste their money on something they do not want to maintain?
Regular Cleaning of the Bike
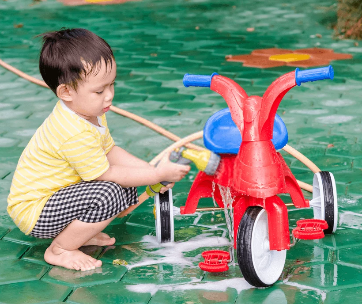
With the various adjustments and the ABCD test passed, you also need to ensure that the bike is washed regularly. A clean bike rides well, and a sure way is to teach the kids how to wash their bikes. It is a simple process that can take less than an hour but will teach them the aspect of hygiene and make them independent thinkers.
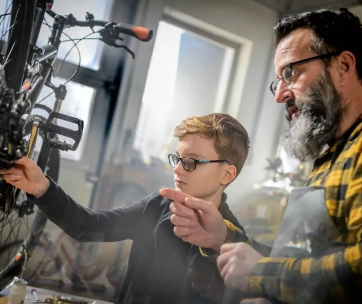
Teach the kids the value of bike maintenance
Doing it for them will likely set them up in a motion to know what to do. However, training the kids on bike maintenance skills will keep them going. It is also a chance to pass skills down your family tree. When teaching the kids, focus on adjusting the brakes, seat height, and how to fix flats on their own. Equally, let them practice under your watch. If you are not knowledgeable enough, you can link them up with the local bike store or local bike clubs to learn more about bike maintenance. Sometimes if you are lucky enough, grab the chance when a bike mechanic clinic is in your town and let your kids learn as much as they can. We also noticed that organized kid’s races also train kids on basic bike maintenance skills.
Final words
Whether you are maintaining your kid’s bike so that it lasts or preparing them for a new school year, bike maintenance is a top routine you should never miss. Like a car needs servicing, a bike needs regular checks to ensure that everything is running smoothly.
As parents or guardians, the role of initial maintenance automatically becomes ours. However, we can train our kids on bike maintenance skills, pushing them through their lives.
Bike maintenance is also part of the safety of the kids when on their bikes. And when they encounter others with problems, kids with a background in maintaining their bikes will always help.


Comments